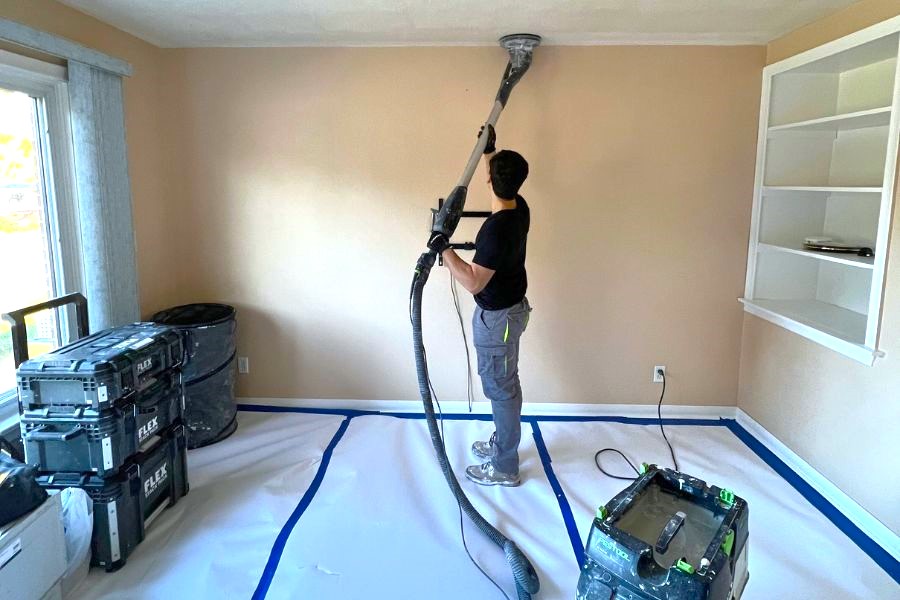
It was a quiet Sunday afternoon when John and Lisa decided to tackle the project they’d avoided for years—removing the popcorn ceiling in their 1970s-era home. What started as a simple scrape quickly turned into a more complex job than they had anticipated. They realized they were dealing with more than an eyesore as they chipped away at the old, bumpy texture. The task of removing the popcorn ceiling had transformed their entire space, leaving it brighter and more modern. But as with many DIY projects, they learned there’s more to popcorn ceiling removal than meets the eye.
Popcorn ceilings, popular in homes built between the 1950s and 1980s, were initially favored for hiding imperfections and absorbing sound. However, as design trends have shifted toward sleeker, more modern aesthetics, many homeowners opt to remove them. In this article, we’ll explore the process of removing a popcorn ceiling, the costs involved, and the benefits of saying goodbye to this outdated feature. We’ll also include real-world stats to help you understand the project’s scope and whether it’s worth tackling yourself or hiring a professional.
What Are Popcorn Ceilings?
Popcorn ceilings, acoustic or textured ceilings, were a popular design feature in mid-century homes. The ceilings were often sprayed with plaster and small particles, giving them a bumpy, textured look resembling popcorn. The purpose of this design was both functional and aesthetic: popcorn ceilings could mask imperfections in the ceiling and had sound-dampening qualities.
However, as time passed, homeowners began to view popcorn ceilings needing updating. They collect dust and cobwebs and can also contain asbestos if applied before the 1980s, making removal more than just a cosmetic decision. The demand for popcorn ceiling removal has surged as homeowners seek cleaner, more modern ceiling designs.
The Process of Popcorn Ceiling Removal
Removing a popcorn ceiling can be labor-intensive, especially if you do it yourself. The procedure typically involves scraping away the textured surface, repairing any damage underneath, and finishing the ceiling with a smoother texture. Let’s break down the steps involved:
- Testing for Asbestos
Before starting any removal process, it’s crucial to determine whether the popcorn ceiling contains asbestos. Homes built before 1980 are more likely to have used materials containing asbestos, a hazardous material that can cause respiratory issues when disturbed. A professional testing kit or an inspection from a licensed contractor can confirm whether the ceiling is safe to remove.
According to the Environmental Protection Agency (EPA), the presence of asbestos in building materials was banned in 1978. However, homes built in the late 1970s and early 1980s may still contain asbestos as builders continued using existing supplies.
Key Stats:
- Popcorn ceilings in homes built before 1980 have a higher chance of containing asbestos.
- Asbestos testing costs between $200 and $800, depending on the size of the home.
- Preparation and Protection
Once you’ve confirmed that the ceiling is asbestos-free, the next step is preparing the space. Removing a popcorn ceiling is messy, so you’ll want to cover floors, furniture, and walls with plastic sheeting or drop cloths. Protective gear, including a mask and goggles, is essential to avoid inhaling dust and particles.
- Wet Scraping
The most common method for removing popcorn ceilings is the wet scrape technique. This involves spraying the ceiling with water to soften the texture, making it easier to scrape off. A wide putty knife or a special popcorn ceiling scraper can gently remove the textured material.
While this method is effective, it’s time-consuming, especially for larger rooms. Homeowners can expect to spend several hours scraping a single room. If the ceiling was painted after the popcorn texture was applied, removal can be more challenging, as the paint may make the texture harder to penetrate.
Key Stats:
- Scraping an average-sized room (approximately 250 square feet) can take 6 to 10 hours.
- Using a professional popcorn ceiling removal service can cut this time significantly.
- Repairing and Finishing the Ceiling
Once the popcorn texture is removed, the ceiling may need additional work to smooth it out. This often includes repairing any damage or imperfections revealed during scraping, applying a skim coat of plaster or drywall compound, and sanding the surface smooth. Finally, the ceiling can be painted for a clean, modern finish.
Cost of Popcorn Ceiling Removal
The cost of removing a popcorn ceiling varies depending on whether you choose to do it yourself or hire a professional. DIYers’ primary costs are tools and supplies, including plastic sheeting, putty knives, and joint compounds. On average, a DIY popcorn ceiling removal project costs between $100 and $300 for materials, depending on the size of the room.
Hiring a professional can be more expensive but often results in a quicker and cleaner process. HomeAdvisor says professional popcorn ceiling removal costs between $1 and $2 per square foot, with the national average hovering around $1,800 for a 1,500-square-foot home. This price can increase if asbestos is present, as licensed professionals must handle removal and involve specialized equipment and disposal fees.
Key Stats:
- DIY removal costs: $100 to $300 for tools and supplies.
- Professional removal costs: $1 to $2 per square foot.
- The average cost for a 1,500-square-foot home is $1,800 (without asbestos).
Benefits of Removing Popcorn Ceilings
While removing popcorn ceilings can be a labor-intensive and sometimes costly project, the benefits are often well worth the effort. Here are some of the key advantages:
- Aesthetic Appeal
The most obvious benefit is the improvement in the room’s appearance. Popcorn ceilings look dated and can make spaces feel smaller or more closed in. Removing the texture and opting for a smooth ceiling makes rooms feel more modern and open. This is especially important for homeowners looking to sell, as updated ceilings can make a home more attractive to buyers.
According to a survey by the National Association of Realtors (NAR), homes with smooth ceilings are often easier to sell, as many potential buyers see popcorn ceilings as undesirable.
- Increased Home Value
Removing popcorn ceilings can improve aesthetics and increase a home’s value. A report by Zillow found that homes with smooth, modern ceilings could sell for up to 3.5% more than homes with outdated popcorn textures. This means that homeowners who invest in popcorn ceiling removal often see a return on their investment, particularly if they plan to sell shortly.
Key Stats:
- Homes with smooth ceilings can sell for up to 3.5% more (Zillow).
- Improved Air Quality
Popcorn ceilings are notorious for trapping dust, cobwebs, and allergens. Over time, this can affect indoor air quality, especially for households with allergies or asthma. Removing the textured surface makes it much easier to clean and maintain a dust-free environment, leading to better air quality and a healthier home.
Should You DIY or Hire a Professional?
For many homeowners, the decision to DIY or hire a professional comes down to time, expertise, and budget. If you have the patience and are comfortable with basic home improvement tasks, removing a popcorn ceiling can save you significant money. However, hiring a professional is often the best option if you need more time or the ceiling contains asbestos.
Professionals can complete the job faster and with less mess, and they’re better equipped to handle any issues that arise, such as ceiling damage or complex repairs.
Conclusion: Is Popcorn Ceiling Removal Worth It?
For homeowners like John and Lisa, removing a popcorn ceiling may be daunting, but the end result is well worth the effort. Removing dated and dusty popcorn ceilings can dramatically improve a home’s appearance, increase its resale value, and even improve air quality.
Whether you tackle the project yourself or hire professionals, popcorn ceiling removal is a worthy investment that can transform your space from outdated to modern and stylish. With the right approach, you’ll be well on your way to a ceiling that looks as fresh and bright as the rest of your home.
You may also read
standard size of bathroom in feet


